The very first thing that the universe is teaching me: always save your work as you go. I believe I am not the only one... but I think you can figure out what I'm talking about.
Are you like me, and when you have a project in mind it keeps morphing at each step? Leading you down a design tornado? Increasing the amount of your hobbies exponentially?
Kind of like asking the question: where does cream of tartar come from... and 2 days later you are making your own wine.
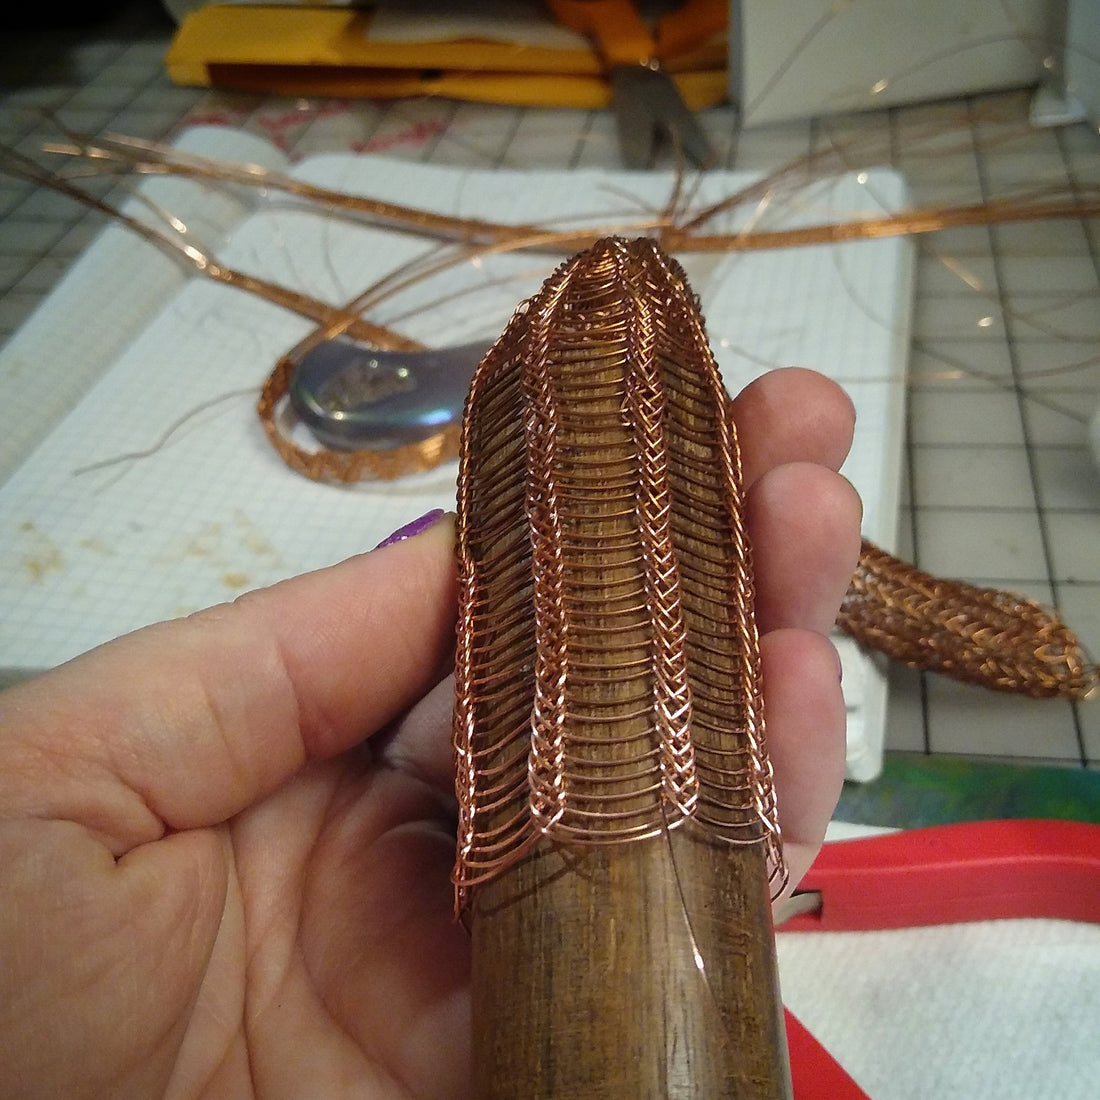
This is one of those projects. In the middle of 2019, I had the pleasure of taking a historical wire ring making class. The teacher was so wonderful and easy to follow I stuck around for the Viking wire weaving class. I learned how to make a "daisy", and using a #2 pencil as a form, came away with a wonderful length of woven copper wire. I was so excited I started making different sizes and styles. Around the end of the year, looking for a way to challenge myself, I started a "daisy" on a 1.5" diameter dowel form. It had 9 petals, so that meant 9 ribs in the weave.

The above picture is the raw weave on the dowel form. As the wire weave was slid off the dowel form, I hand-condensed the weave down to 1" diameter. After the piece was done with weaving and off the dowel form, it was pulled through a draw plate down reaching a final diameter of 0.5".

This draw plate step, tightened the ribs and lengthened them. With the decreased diameter the weave became stronger but had less movement, the weave would then keep a soft shape. Through out all the design and weaving I was trying to figure out what was the final piece going to be? A necklace, a bracelet, an anklet, a belt, maybe a chain for my Viking Apron Dress Bling? As I played more with the final piece I realized I wanted the piece stiffer- I really did not want it to flex at all.
I ended up going down to the hardware store and purchasing some solid copper grounding wire, about 0.25" in diameter. I threaded this through the center, and was able to create a stiffed piece with a floating weave around it.
Ah-Ha! I now knew what it was going to be: a Viking Torc for my Husband. Unique, durable, highly conductive, and seductive- Just like him.
Since I now had an end vision in mind, I had to figure out how to finish it. Now the weave is like a jersey or knit loop, at both ends there are open loops. These need to be stabilized. I went onto the interwebs and took tutorials and watched videos on all types of finishes for Wire weaving. I learned how to wire work end caps, make wire ball knots, learned how to copper solder, and even use my glass torch to change the wire ends. But nothing I did spoke to me. All I knew is I needed to stabilize the ends:

As of right now this is where it's at.
I want end caps, I have an idea of sprial/knotwork ball ends, but how was I going to get them just right? So I went back to the interwebs... and now being added to my hobbies: precious metal clay (PMC).
It's in the mail.
I will update as things come in, and the results... but for now I am excitedly watching all the tutorials I can find.
Get out there and discover something new! Then come back and check on the progress.